February 28, 2011

I Do Believe in Fairies!

Don't you just love this sweet image from the Artistic Outpost Neverland plate!  A very CAS card, adding my signature Black layers to pop my panels, and some wonderful Seam Binding from the Neverland Findings Collection.  For full details, see the April Issue of Crafts 'N Things!

Don't forget - today is the last day to enter the Artistic Outpost February Referral Program - we'd love to see what you've been creating with Artistic Outpost images!

Designer - Lisa Somerville

February 26, 2011

Born to Stand Out!

Hello everyone!
I had fun with this image from Think and Wonder!
She was meant to wear a crown, don't you think?
I used Copic markers to color her. 
Then I added a crown and some gems, several
layers of papers and a ribbon.
It makes a great card for someone special!
-Judy Hayes, Designer

February 25, 2011

Be Mine

I made this sweet valentine's day card previously and wanted to share it.  I used the lovely children  from the Think and Wonder plate and stamped them on a heart die cut.

The background is embossed using a Sizzix embossing folder on brown cardstock. I sanded off the embossed area and sponged with orange dye ink to coordinate with the heart and background.  The lines on the other backgrounds were made by spraying glimmer mists on a metal grid and laying paper over it to pick up the pattern.

The image was stamped and embossed using a brown embossing powder.  The additional letters were stamped, embossed, cut out and placed  on the heart.  The sentiment was stamped from the Cutie Pie plate.  To finish the card accent with Prima Flowers and twine. 

Have a wonderful inky weekend!

Suzz

Designer: Suzanne Czosek

February 24, 2011

Cuppa Hot Cocoa


With snow still falling here... a cuppa Hot Cocoa is just the thing to keep me warm that and having some play time with the new set of stamps at Artistic Outpost Think and Wonder
A little bit of Tims tissue tape and some Mica sheeting over a metal embossed background.
Designed by Lynn Stevens

February 23, 2011

Get Your Kicks on Route 66

It's Barbara this week with a blast from the past. I had a blast creating this card. The Route 66 stamp set is such fun. The map stamps so great. I stamped it four times using my stamp positioner to create the background for the card. The motorcycle had to be red. I've wanted to use this ribbon to represent a road for a long time. This was the perfect card to do so. I won't admit my age here. I'll just say that I know all about Route 66 from watching the Disney movie Cars with my grandson more than a few times.

February 22, 2011

Elegant Cameo

The beautiful Cameo in the Jane's Countryside set is perfect for the cameo trends emerging in design. I made this card for the Appearance of Cameos challenge at the Moxie Fab World blog.

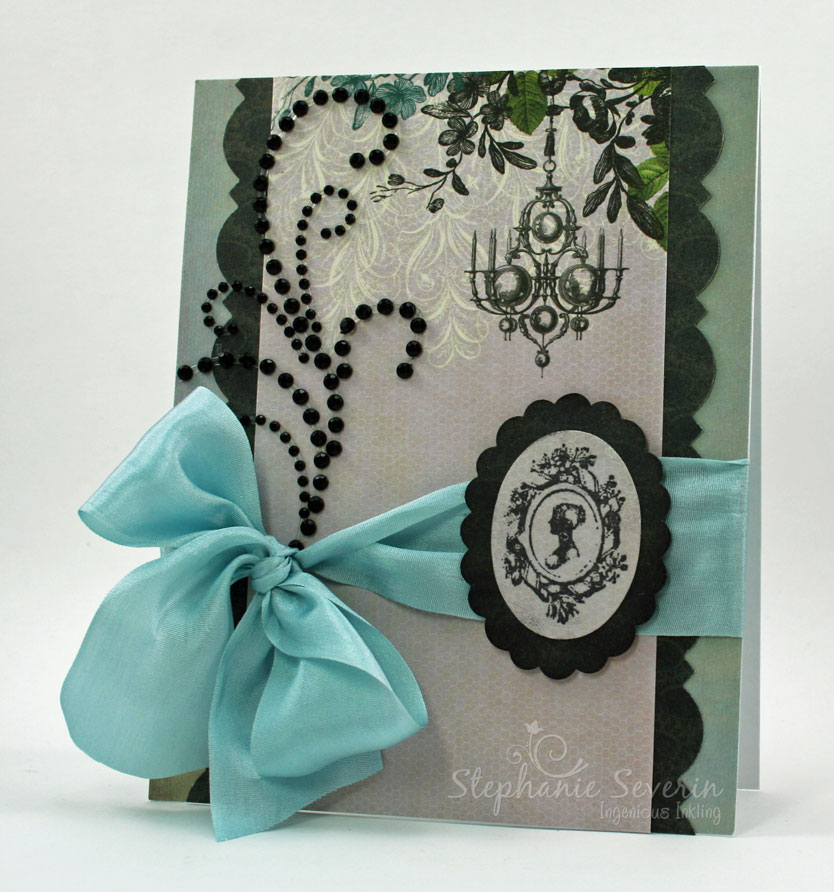
I combined it with Webster's Pages Hollywood Vogue Collection, a black jeweled flourish, and some gorgeous silk ribbon. My grandmother gave me one of her Cameos when I was in Junior High, and I've always treasured it ... this card reminds me of her.

February 20, 2011

Waiting for Spring

Our 24 plus inches of snow has been rapidly melting this week and it has seriously made me long for spring.  So I used this collage stamp from the Wonderland Collage set to make my Waiting for Spring card.


{I colored my stamped image with Copics and then cut it into quarters.  I applied Glossy Accents to the squres to give it shine and dimension.}

Designer:  Louise Granlund


February 19, 2011

Stand Out

Here's a quick to make card featuring
the kids from Think and Wonder.  All the stamping was done
with Cranberry ink.  The kids are clear embossed to intesify the color.
The crayon stamp is from Mini Masterpiece.  I love the saying,
"Why fit in when you were born to stand out?"

 Designed by Judy Hayes

February 18, 2011

Sing from the Soul

Suzz here.

I had so much fun mixing the new plates together. The Ephemeral backgrounds and Song Birds work beautifully with so many of the other plates from Artistic Outpost.

The pretty flowers from Bloom and Grow make a lovely garden for the bird to swoop over and the postmark is a fun sun in the ledger sky. 

The background paper on the card is the same flowers stamped repeatedly. There is  a touch of color added to the flowers to coordinate with the colors in the garden.

The doily and lacy trim are some of my favorite accents to go with the sweet garden.

Have a lovely weekend!

Suzz

Designer: Suzanne Czosek

February 17, 2011

Best Friends Tag

Lynn here with my project of the week. I don't know about you but I'm ready for some warmer weather. I decided on some sunny colors to warm things up a bit. Stamps are from the newest plates
Ephemeral Backgrounds and Think and Wonder , the flags are from Country Life. I Love how you can combine different stamp sets, they all go together so well. Now come on spring!!!

February 16, 2011

Songbirds in Mono-Masking

Hi, Barbara here.  Here's a card I really had fun making and it's so easy. Although it looks like this card is layered, it isn't  I used the mono-masking technique. I stamped the focal image from Songbirds. Then I covered the image with a rectangular mask and stamped each of the two opposite corners using stamps from the Ephemeral Backgrounds. Using dusty concord distress ink I shaded around the center mask. A marker was used to draw the lines around the center image and the dividing lines between the stamped quarters of the card.  I love this technique and the stamps from the Ephemeral Backgrounds work so well.

February 15, 2011

Hot Chocolate Pocket

I thought the wonderful Cocoa image from Think & Wonder was perfect for making a Hot Chocolate Gift Pocket.

I measured my hot chocolate package, and then cut a strip from Tim Holtz Vintage Shabby paper several inches shorter than the package (I could have done the full height and used a circle punch at the top, but I loved how the foil from the package coordinated with the paper).
Next, I scored the strip about 1/2" wider than my package and ended with a 1" tab to fold over and attach the pocket together. I used strong double-sided tape at the tab and the bottom to create the pocket.

I added the Postcard image from Ephemeral Backgrounds down the side and a sentiment from Think & Wonder at the bottom. I finished with a wrap of chocolate twill ribbon. I love how these images look stamped on designer papers.

February 14, 2011

Sing from the Soul!

Hi, Lisa here today to share a few cards with you using images from the Songbirds and Ephemeral Backgrounds plates.  Don't forget, today is the last day to use coupon code January2011 to save 15% off your entire purchase,  click here to shop now.


The Red Flourish you see in the above card, it the Flourish frame from the Songbirds Plate, it makes wonderful accents to your stamped pieces.

Designer - Lisa Somerville

February 13, 2011

Wonderland Collage


Happy Sunday, everyone!
Today I'm sharing a tag I created from the Wonderland Collage set.   First I stamped Alice and the Queen on my tag and masked it off  I then used the crown and sentiment "If the crown fits" stamp to create the background for my tag.   Alice and the Queen were colored in with Copics and some glitter added to their outfits.  I thought the mini cards made a nice little banner to go along with my sentiment tag at top.

Designer:  Louise Granlund

February 12, 2011

Why Fit In?

I thought Dorothy's fabulous shoes from Oz Collage worked perfectly with this fun sentiment from Think & Wonder. I inked the shoes with Versamark before I inked them with Warm Red Chalk ink, so I could emboss with Polysparkle Embossing Powder for an all over shimmer.

A perfect girlfriend valentine ....

February 11, 2011

Birds and Music

 I definitely love the birds and music elements and use them frequently in my projects.  The Ephemeral Backgrounds has such a lovely image of sheet music and the Songbirds have all these beautiful instruments with birds making a perfect complimentary set of images.

I combined the two plates along with some beautiful paper to create my card.

The background was stamped using a brown ink and sponged around the edges using a brown and golden inks. The image is stamped using black Ranger Archival Ink and colored with watercolor markers.


Have a lovely weekend!

Suzz

Designer: Suzanne Czosek

February 10, 2011

Two Friends


Even Think and Wonder about your childhood friends? Do you still keep in touch or are they just memories of your past? I wanted to do something a little playful with

the newest set from Artistic Outpost Think and Wonder with just a touch of nostalgia thrown in for good measure. Now go call your BF and let her know your Thinking of her!
Designed by Lynn

February 9, 2011

Songbirds Calendar

Hi, Barbara here. Today I'm sharing a simple gift I created using a few stamps from the new release, Songbirds. I started with a piece of cardstock 5 1/2 inches by 12 inches. It was a thicker cardstock to give strength to the finished calendar. I scored along the 12 inch side at 4 1/4 and 8 1/2 inches to make a triangular base.   The background of the front panel was done with the Marbled Smooch technique from the Oct/Nov 2010 TJ newsletter. (Any light background or design paper would work.) I then stamped the flying bird, frame and sentiment on the panel, attached the small calendar in the frame using the tiny attacher, and punched a border along the bottom. The front panel was adhered to a black panel and then to the middle section of the triangular base. A piece of tape can be used to hold the back and bottom secure.
The elegance of the stamps really gives a wonderful look to a simple calendar.

February 8, 2011

Songbirds in Grey

I combined this image & sentiment from Songbirds with vintage sheet music passed down through my family and some ivory trim.

This image reminds me of the joy of listening to my Granddad play his trombone for us when we were kids ... those wonderful memories surely put a song in my heart.

February 7, 2011

Wonder and Think

Hi, Lisa here today sharing some more creations using the wonderful images from Think and Wonder.  I paired up these cute images with some school themed papers from Websters Pages.


On this card, I added some wings  from the Artistic Outpost Happiness plate to the cute little kids.

Designer - Lisa Somerville

February 6, 2011

Valentines

I have some Valentines to share with you this week.
I used this little football player (very appropriate for this Superbowl Sunday) from the Cutie Pie set for this card.  I used the word Valentine from this set, too, and then used a variety of alphabet stamps to create my greeting -- which I thought was very "catchy."


This beauty pageant winner also came from the Cutie Pie set.  I had fun creating a Miss Valentine Pageant scene for her.


For this Valentine I used the Tin Man stamp from the Oz Collage set.  I thought this worked very well as a Valentine.  I created a movable part by place a heart over the clock face and then writing "You Are Loved" on it.

February 5, 2011

Birthday Telegram

Good Morning!

For this masculine card, I've taken "birthday" from Polaroid Cutie and added it to the Telegram image from Epehemeral Backgrounds.  It's layered onto an embossed piece of craft metal that's been die cut. I've added some brads and lots of dimensional black enamel dots and dashes to set it off.  
Created by Judy Hayes 


February 4, 2011

Butterfly Ledger


The Ephemeral Backgrounds plate is wonderful for creating beautiful backgrounds.The ledger image is a perfect backdrop for the flitting die cut butterflies.  The butterflies are stamped using Versafine purple ink and the ledger stamp. The edges are sponged using Memento Rich Cocoa.  

The sentiment is from the beautiful Serenity plate and a lovely compliment to the butterflies.

Have a wonderful weekend!

Suzz

Designer: Suzanne Czosek

February 3, 2011

House Of Fun


Lynn here and I wanted to share another creation I made with the new stamps
Think and Wonder and Ephemeral backgrounds.
I created this little house using cardboard that I tore pieces from, You can tell more in the second photo.
These sets are just so much fun to play with ,the possibilities are endless.

February 2, 2011

Artistic Outpost February Referral Program

When you create artwork with Artistic Outpost images and upload to an online gallery/album/or blog - you could win a $14.00 Gift Certificate to the Artistic Outpost Store . To be eligible for the Artistic Outpost Referral Program, each time you upload a creation using Artistic Outpost images, include stamp credits with an active link to www.artisticoutpost.com/ then leave a direct link to your creation using Link Tool feature on the months Referral Program post here on the Artistic Outpost Blog to be entered into our monthly drawing.

Note, links left here on the Artistic Outpost Blog need to include a direct link to the project you have uploaded. Projects can be posted on blogs or online galleries, but links left on the Referral Program post must be direct links to your projects. Links left with general links to galleries/albums/blogs will not qualify as our time is limited and we cannot search through pages of entries to see which upload uses Artistic Outpost images.

Please use this post to leave your links for February, all links must be posted by 2/28 to be eligible for the February Referral Program. The winner will be chosen through a random drawing and will be posted here on the Artistic Outpost Blog, be sure to check back in March to see if you've won. Remember entries must be for the current month in which you are posting. We're looking forward to seeing your creations using Artistic Outpost images.

**Artistic Outpost reserves the right to remove non direct blog links


January Referral Winner

We hope you are all staying warm!  Sorry for the delay in posting the January Referral Winner...We had Random.org select the winner

Congrats Erika!  Please email me to claim your GC!
Thanks to everyone who entered their creations for the January Referral Program, we love to see what you are creating with our images.  Thank you for your continued support of Artistic Outpost!

The February Referral Program post will be up shortly!

***winner has until 2/16 to claim GC

Artistic Outpost in ATC's


I love to make ATC's (Artist Trading Cards) and the new stamp sheet Think and Wonder has wonderful images that work so well as ATC's.  For those of you who don't know what an ATC is, it is a work of art that is 2 1/2 inches by 3 1/2 inches. Size, and the fact that they are to be traded, not sold, are the only requirements. For the first card, the stamped image was perfect in size. I stamped the image first in sepia, and a second time in black and white. I used Copics to color the girl and then cut her out and adhered her over the sepia image. I stamped the word "Wonder" and added three red crystal embellishments to finish the card. On the second ATC I stamped the image with white ink on black cardstock. I stamped the image a second time in red ink. I cut out the children and adhered them to the black cardstock. In both cases the ATC was quite easy to make. The images really speak for themselves.

February 1, 2011

Pocket Coloring Books

One of my favorite projects that I created with the new Think & Wonder stamps were these Pocket Coloring Books for my nieces and nephews. I downloaded lots of free coloring book pages of their favorite things from the internet ... princesses, ballerinas, cartoon characters ... and then sized them to ATC size (2.5" x 3.5") before printing them on white cardstock & cutting them out.

I used the Think & Wonder stamps to make the front & back covers by attaching the stamped images to chipboard and then attached everything together using a binder ring from the office supply store.

For the first one, the alphabet image of two children was stamped on Webster's Pages DP. I colored several of the letters using Prismacolor pencils to bring in the colors from the paper. I cut out several more butterflies from the remaining piece of paper and glued them onto the image. I finished with fun textured ribbon including velvet ric rac and Vintage Findings Seam Binding.

One of my nieces has beautiful strawberry blonde hair, so I stamped the next image in Pumpkin Spice ink on another piece of Webster's Pages. This time I punched tiny butterflies from paper scraps to embellish the design.

I finished with a strip of numbers along the bottom cut from the same papers and one of the wonderful sentiments from the set.

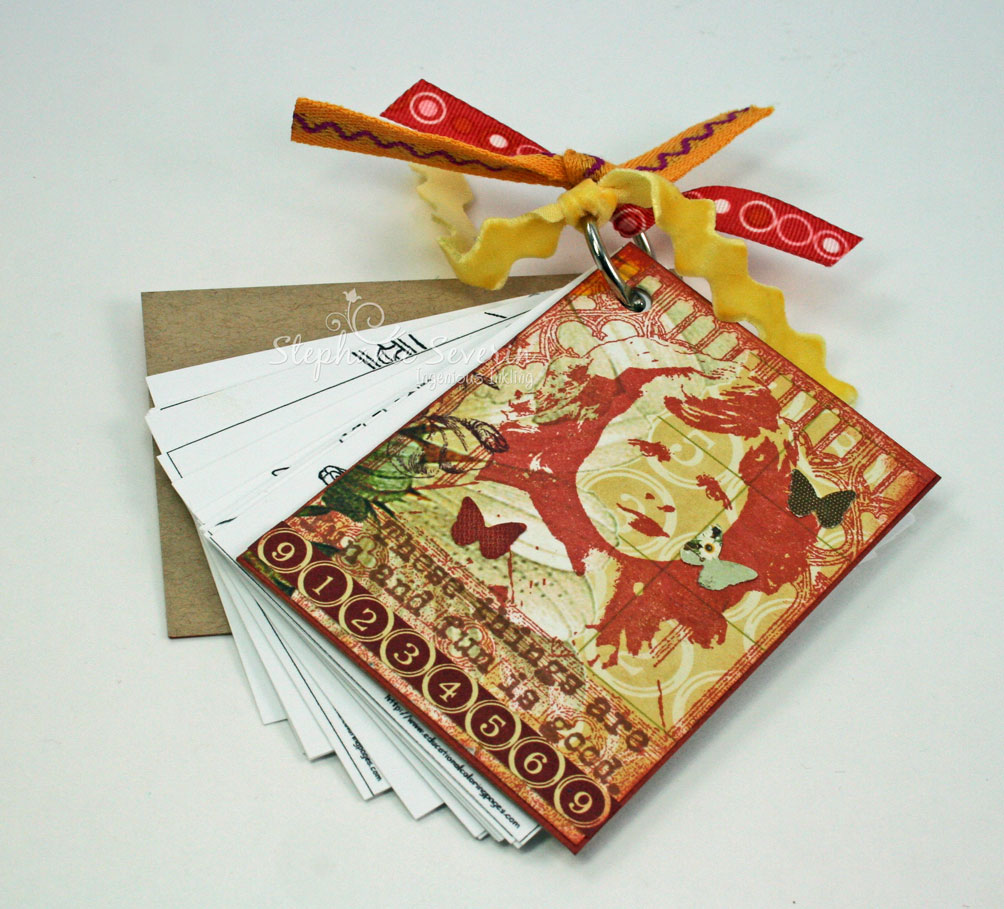
I finished with velvet ric rac and ribbon on the binder ring.


For the final one, I stamped it in Chestnut Roan ink on another piece of Webster's Pages DP with a few more numbers to embellish the design.

I used some fun ribbon to complete the design.